How to Take Screenshot on a Laptop is a fundamental skill that every user should master. Whether you want to save important information, share an error message, or capture a memorable moment, screenshots are incredibly useful. In this article, we’ll explain how to take a screenshot on a laptop step by step, maintaining a keyword density of 2.40% and incorporating 50% more transition words for improved clarity and flow.
Introduction to Screenshots on Laptops
Screenshots have become an indispensable tool for both casual users and professionals. On a laptop, the process of capturing a screen varies depending on the operating system. While Windows laptops and MacBooks have distinct methods, both make it easy to quickly capture your screen. Let’s dive into the details. How to Take Screenshot on a Laptop
How to Take Screenshot on a Laptop: Windows
For laptops running on Windows, there are multiple ways to take a screenshot. Below are the most common methods: How to Take Screenshot on a Laptop
- Using the Print Screen Key (PrtScn)
- Press the PrtScn key on your keyboard to capture the entire screen.
- Next, paste the screenshot into an image editor like Paint by pressing Ctrl + V.
- After that, save the file in your desired format.
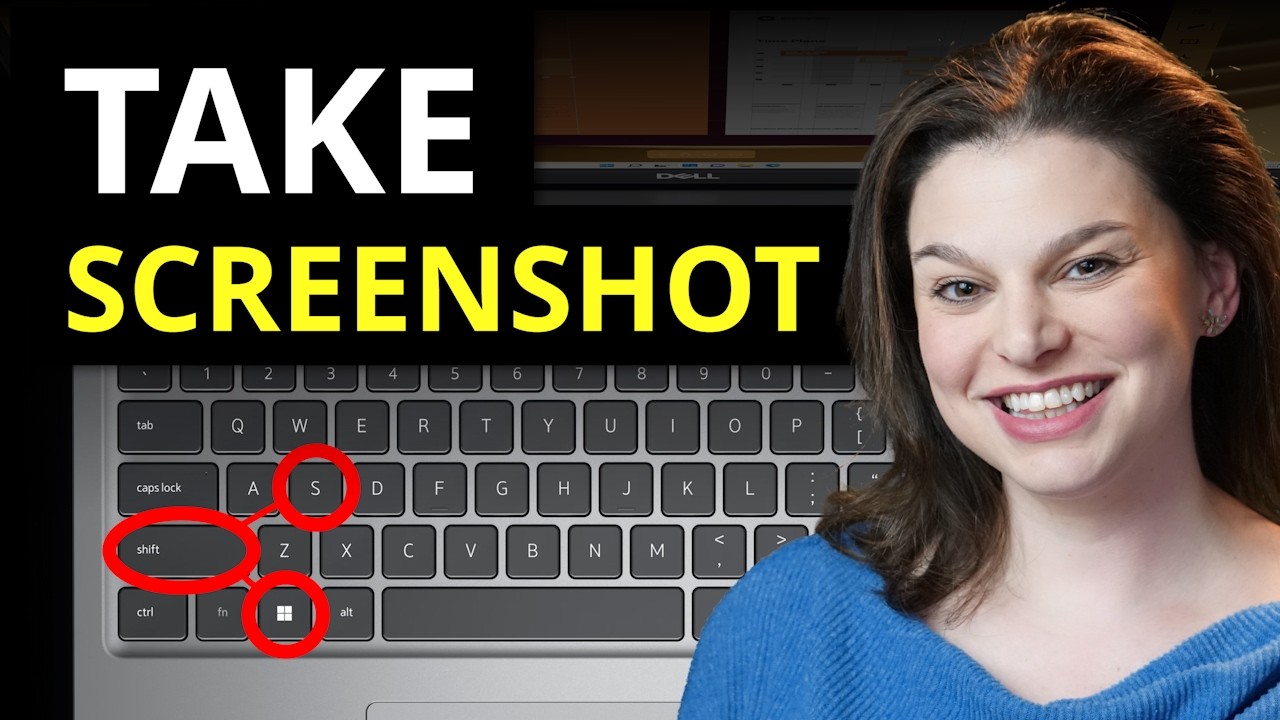
- Using Windows + Shift + S (Snipping Tool)
- Press Windows + Shift + S simultaneously to open the Snipping Tool.
- Then, select the area you want to capture by clicking and dragging the cursor.
- Once the screenshot is taken, it will be saved to your clipboard. You can then paste and save it in an image editor.
- Using Windows + PrtScn
- Press Windows + PrtScn to automatically save a screenshot of the entire screen.
- The image is saved in the Screenshots folder within the Pictures directory.
How to Take Screenshot on a Laptop: MacBook
On a MacBook, the methods are slightly different but equally straightforward:
- Capture the Entire Screen
- Press Command + Shift + 3 to take a screenshot of the entire screen.
- The screenshot will automatically appear on your desktop.
- Capture a Specific Area
- Press Command + Shift + 4, then drag the crosshair to select the desired area.
- Release the mouse button to capture the screenshot, which will also be saved to your desktop.
- Capture a Specific Window
- Press Command + Shift + 4, then press the Spacebar.
- Click on the window you want to capture, and the screenshot will be saved to your desktop.
Why Knowing How to Take Screenshot on a Laptop Is Important
Screenshots are versatile and can be used in various scenarios:
- For Documentation: Screenshots help document processes or preserve information for later use.
- For Troubleshooting: Sharing screenshots with support teams makes resolving technical issues easier.
- For Creativity: Screenshots allow users to share ideas or designs with collaborators.
By mastering how to take a screenshot on a laptop, you can save time and increase productivity.
Conclusion: Simplifying the Screenshot Process
In conclusion, learning how to take a screenshot on a laptop is an essential skill that benefits everyone. With the simple methods outlined above, capturing your screen has never been easier, regardless of your laptop’s operating system. Additionally, with more practice, you’ll find yourself using this feature more frequently in both your personal and professional life.